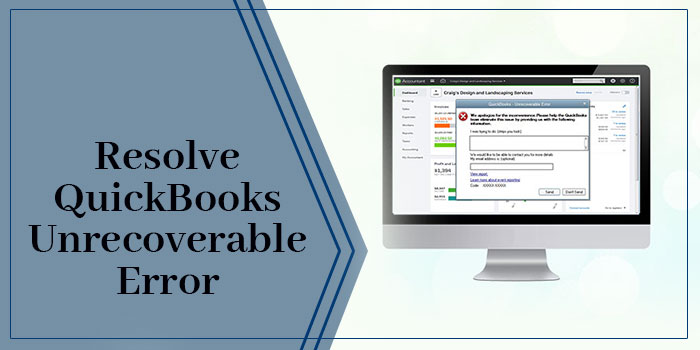
QuickBooks Unrecoverable Errors can cause problems for users. Unrecoverable errors can appear in QuickBooks and can be very frustrating. This error can cause QuickBooks to crash, freeze or stop responding. Data loss can also be caused by QuickBook’s Unrecoverable Error. QuickBooks Unrecoverable error is usually caused by damaged or corrupt QuickBooks files. It can be difficult to diagnose QuickBook’s Unrecoverable error. This error can be quickly fixed with some knowledge.
Most of these errors can be fixed with simple solutions. We’ll show you how to fix most QuickBooks Unrecoverable error codes. If you still have trouble with these solutions, reach out to a QuickBooks expert.
These are the steps to fix unrecoverable error codes in QuickBooks
These are the possible solutions. The first solution is the best place to start your troubleshooting. Make sure you follow each step carefully, and that you move smoothly until you get rid of any unrecoverable errors in QuickBooks. Now, let’s start.
Solution 1 – Fix the QuickBooks Desktop
- First, you must reregister your QB desktop in Windows.
- Secondly. to do this, you will need to open the restart.exe file.
- Then, You will need to repair the problem by going to the Microsoft.net Framework.
- Next, Move on to reinstall the QuickBooks desktop.
- After that update, The software should be updated with the QuickBooks Upgraded Version.
- To repair damaged components or files, use the QuickBooks component repair utility.
Solution 2: Run QuickBooks Component Repair Tool
- Firstly, you must ensure that the QB component repair tool has been installed on your system.
- Secondly, try to install it if it isn’t.
- Thirdly, move on to use this tool.
- Next, follow the instructions on the screen.
- Then, you can update Windows.
- Also, restart your system.
- After that, the final step is to access the program, and then check if the issue has been resolved.
Solution 3 – Verify the number of Users
If the error persists, you can verify that different usernames and login passwords are being used to access the same QB files. You will need to create the user if they are not able to access the file using the same credentials. These steps will help you do this.
For Regular Users Who Cannot Access
- First, to start, tap the tab called setup users and passwords.
- Secondly, choose set users.
- Thirdly, after you are done, visit Enterprise Users.
- Next, click on User Options in your company menu.
- Then, really look at the case that says “Arrangement clients and jobs”.
- After that, click on the Add user button.
- Then, enter the correct user name and password next.
- Click Next.
- You must ensure that the user name is not damaged.
- Therefore, you should tailor the customer to your liking.
- Click on the Finish icon.
- Move on to the File menu.
- Log in or choose the Close company.
- You can sign in to your QB file with the new login credentials.
If an Administrator User Cannot Access
- Firstly, close The QuickBooks Desktop.
- Secondly, download the QuickBooks Tool Hub.
- Next, Choose the QuickBooks File Doctor tool.
- Then, this tool scans the system for corruption and repairs it quickly.
- After that, now you are ready to start your business operations.

Solution 4 – Use Reboot.bat to File
- Initiate the procedure by spotting the reboot.bat file under C:\Program Files(x86)\Intuit\QuickBooks xxx Ver 00.0. It is possible that you will need to be aware of the fact that xxx or 00.0 notify which version of QuickBooks software you are using.
- Right-click the Reboot.bat file and go to it.
- Also, you can run the file as an administrator.
- Check the program to see if the error is fixed.
- If the problem persists, reboot your system.
Solution 5 – Make a new Window Admin
If none of these solutions work, then you can jump to the next solution and create a new admin window. These are the steps you should follow to do the same.
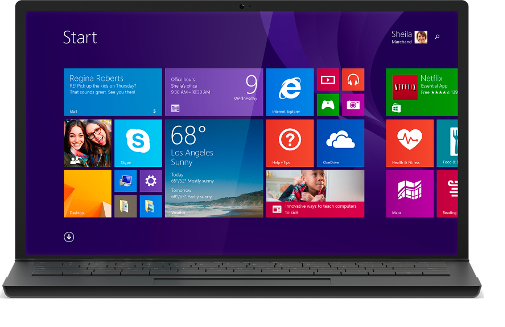
Windows 8.1
- Click the Windows+ R to open the Run window.
- In the space field, place the Control Panel.
- Click the OK icon.
- Next, click the User Accounts.
- Once you have done that, go to the Manage another Account tab.
- Simply tap on the tab titled Add an Account.
- Sign in Without a Microsoft account
- Be sure to select the local tab.
- Enter your username and password.
- Hit Next.
- Once you have completed all steps, you will see a new window called Manage Other Accounts.
- Next, tap on your newly created account.
- Click the Edit icon.
- Next, select the tab admin.
- Click OK.
Windows 8 & 7
- To open the Run window, press the Windows +R button.
- In the box, type Control Panel.
- Click the OK button.
- Select the tab User accounts.
- Next, click on Manage another account.
- Click the tab to create a new account.
- Enter the name for the new account.
- Click on the Administrator tab.

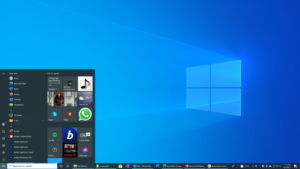
Windows 10
- To begin, tap on the Start menu.
- Moving towards the Settings
- Select Accounts as your next option.
- Tap on the Family tab and other users tab.
- Navigate to Next, and add another user to this computer.
- It can be found under the icon of another user.
- Click on the tab “I don’t have this person’s sign-in information” and choose it.
- Move towards Adding a user to your Microsoft Account.
- Continue to the next step, and give a new name to your account.
- Click the Finish tab.
- Protect and secure yourself with a password
- Navigate to the account you have just created.
- Next, select the Account Type tab.
- After you’ve completed the procedure, click on the administrator tab.
- Click OK.
Next, Solution 6 – Copy the QB File to Your Desktop
- Find the QB file in the folder you opened.
- Navigate to the location option, and locate the file with the .qbwextension.
- Copy the file and paste it to your desktop.
- Hit the Ctrl button to start the software.
- Now, a window called No company Open will appear.
- Click on the Open to just browse that file you used for placing your company file.
Then, Solution 7: Run Quick Fix my Program
- Start the process by closing your QuickBooks desktop.
- The upgraded version of QuickBooks Tool Hub must be downloaded.
- You must ensure that you save the file.
- If the tool hub has been installed, you can acknowledge it.
- Once you are done, click the Home button.
- Next, access the file you’ve downloaded successfully.
- You need to keep in mind that the file was saved as QuickBooksToolHub.exe.
- Follow the instructions in the first step. Then, try to install the item and get your agreement.
- When the installation process is complete, click the Accept button.
- Double-click the icon of the tool hub to access it.
- You will now need to select the tab titled Program Problems.
- Next, select Quick Fix My Program.
- All background programs will be closed and the tool will start them.
- Just close the QuickBooks desktop, and then open your data file.
After that, Solution 8 – Suppression of QuickBooks Desktop
This solution can be done in two ways. You can choose the one that suits you best.
Method 1 – Suppress the QB desktop while accessing QuickBooks
- Initially, the user must hold the Ctrl button.
- Next, click on the QuickBooks icon.
- Now, you need to open the Open Window by pressing and holding the Ctrl key until it appears.
Method 2 – Suppress the QB desktop while Accessing the Company. File
- You must move towards the Open window.
- Select the company’s file.
- Next, press the Alt key.
- Next, select the Open tab.
- After you have been redirected to your login details, please release the Alt Key.
- Then, enter your login credentials.
- Do not release the Alt key until the login page appears.
- Click the OK button.
Solution 9 – Shut down the QuickBooks Desktop to Access All Windows
- Use the Alt keys at the beginning.
- Double-click the QuickBooks icon after that.
- If the system opens a dialogue box, then press the alt key.
- For the account, you are logged into, provide your password.
- Hit OK.
- If the software has been launched, tap the Alt Key.
- Stop the process by pressing the ALT key.
When you open the QuickBooks application, close any other apps that are running in the background.
Read More: Virtual Bookkeeping
Solution 10 – Resolve the Error Manually
- Firstly, In the beginning, repair QuickBooks software.
- Secondly, download the QuickBooks Install Diagnostic tool and run it.
- Then, after you are done, restart QuickBooks with Clean Install.
- Next, you can fix Microsoft components by yourself. If you have any problems, contact Microsoft Support to get assistance from an IT specialist.
- Then, install the Microsoft.NET Framework.
- After that, you can recover Microsoft MSXML.
- Make sure you uninstall or reinstall Microsoft Visual C++.
- End of the reboot.exe file.
Solution 11 – Modify the way you save the form
- The Save and Close tab can be used to assist the user.
- You can also access the New Tab at the bottom.
- These buttons allow you to save your transaction.
- Be sure that you do not place the cursor on the blank lines of the sales form.
- Before you click on the Save button, press Print.
- If you wish to print, simply navigate to the File & Print Forms.
If the error occurs while printing, you will need to modify the preferences. These are the steps to help you do the same.
- Proceed to the Preferences tab.
- Just tap the Edit menu.
- Before you select the Printing tab, go to the Company preferences tab.
- Hit OK at the end.
These are the possible solutions to the unrecoverable QuickBooks error. These errors will all resolve the problem. These solutions have been acknowledged by experts so don’t worry about their relevance. To get better results, follow the instructions. Start with the easiest solution, and work your way up to the one that makes your system run smoothly. We hope you find this article useful and that it answers all your questions.